Drupal 7 theming a node form
我慢慢發現 content type node form 是繼 exposed views form 之後最常要修改的 form
(我明明有寫過 alter exposed views form, 但找不到...)
特定 content type 本身是沒有 theme function 的
先定義一個,順便定義使用一個 tpl 檔輸出
form 也可以使用template (*.tpl.php) (Drupal6.x 版)
舊文:
http://www.joetsuihk.com/form_templates
的做法不太正統, 應該要改成: (用 user-login form 為例):
theme 的 template.php 之內:
客製輸出 views 的多個值欄位 (theming view field with multiple values)
Theme developer 顯示, theme_content_view_multiple_field() 決定多個值的時候 views 的輸出,
源碼:
自定Views 欄位輸出 Views fields display
開發多了以後, 慢慢發展了一個自己比較喜歡的 views templating 方式, 分享一下
1. Row style
絕大部份 "Row style" 都會使用 "fields",
是為了靈活性, 可以在 "Fields" 取需要的欄位
相反 "Row style" "node" 只可以選擇 "full node" 或者 "teaser"
而且它的輸出就會使用 node.tpl.php
不方便, 我習慣自己建立 "frontpage" 資料夾專門用作放置該 views 的 template 的
2. *.tpl.php 儲存結構
續上, 一個 views 在該 theme 之內都有一個資料夾
甚至是一個 display 一個, 例如 views "frontpage":
--theme_joe (資料夾)
----frontpage (資料夾)
------views-view-fields--frontpage.tpl.php
----taxonomy (資料夾)
------views-view-fields--taxonomy.tpl.php
views 表格頭 theming (table header theming)
先修文章:
http://joetsuihk.com/node/94
http://joetsuihk.com/node/95
Views 的table header是可以使用 *.tpl.php 修改的,
常見的應用包括使用 icon 而不使用 text 作為 label
只要修改 style output 的 views-view-table.tpl.php
Drupal7 的 模版改變 Drupal7 theming changes
DrupalCon SF 之後, 有很多 video 和session 都放到網上了
花了幾天的時間看了些自己喜歡的, 例如 A peek at Drupal 7 theme system changes
翻譯一下 http://www.slideshare.net/pingv/grok-drupal-7-theming (不是全部的改變, 詳情參考 ref2)
1. Drupal 7 theme 需要有以下元素:
模版的預處理 template preprocess in Drupal 6.x
繼續 Drupal templates 的深度遊
Preprocess 是一個在你的theme 之內的 template.php 內的一組函數
用"一組" 的原因是因為一個theme 是可以有很多 preprocess function
正確來講, 一個 hook 便已經可以有10個 preprocess function (當然, 和 hook 一樣, 不用也是可以的)
而preprocess 的真正功用是,
- 為 templates 提供更多的變數以供使用
- 為hook 提供更多的template suggestion
第一點的功能很明顯, 因為 drupal 內建的 preprocess function (無錯, Drupal core 都是使用 preprocess 的)沒法為你的theme 的特殊性供你需要的變數
你便可以使用preprocess function:
進階 views 模版(二): HTML 列表 Complex views templating, part 2, table, HTML list templates
續 part1
補一下 table 顯示之下的 theming.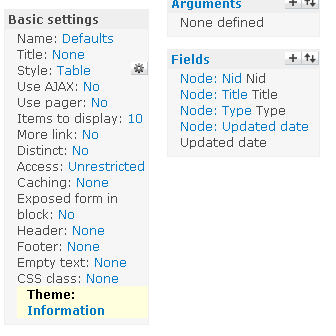
假如你的 table 有4個 fields, views 的 theming information 便有6個 templates:
1個 display 的 tpl (page 或block)
1個 style tpl, 包含了 <table>
每1個 field 都可以有一個自己的 tpl (詳見 attachment)
HTML list (ul, ol) 也是同樣的情況
display + style tpl, 外加每個field 一個tpl
也可以做 field by field 的 tpl, 修改 <ul> 的class, <li>多個 span 之類
Theme-ing "login to post comment", theme_comment_post_forbidden()
Recently, i have find some theme-ing functions that cannot be simply find by theme developer module, as that theme function only calls when you are anonymous user.
comment.module theme_comment_post_forbidden() is an example.
This function render the "Please login to post comments" to anonymous user, request them to login in order to get access to the comment form.
